Over the past year I've focused on my Sculpting skills, this lead to me ignoring some of the other necessary skills necessary for good Character Art. To rectify this I did a deep-dive into creating realistic skin using ZBrush and Substance Painter, for rendering in Unreal Engine 4. Through this little series I'll be detailing how I made the Height, Diffuse, Roughness and Subsurface maps.
We've got our Diffuse map done and dusted. In my opinion, that's the hardest part. Roughness is pretty easy, we just need to have good reference, a keen eye and make sure to break up the homogeny. We've already done similar to this with Fill Layer Dirt 4... set on multiply. It's the same sort of practice going ahead, just with more control over layers. All new fill layers will have only roughness data. No Colour. No Metallic. No Height. Only Roughness.
Now, getting started here is a lot easier than getting started with the base Colour of the skin. We get a Fill layer, set it to only roughness and set roughness to 1. Look at that, so easy I don't have any little videos to show the process. Now, I know I just said there's no base colour data but this is the One Exception. Set the base colour to digital black, this gives us a really easy way to see the effect of our roughness maps.
This base layer is also our Cavity Roughness, so all our other layers are going to be built up from this. To make this cavity roughness, well, CAVITY roughness our next layer has to be only the peaks of our model, this could be done thorough an elaborate series of AO masks and paint layers OR we could use a Curvature Mask like we did in the previous part.
Create a Fill Layer with only roughness data and set the roughness value between 0.4 and 0.5. Add a Bitmap Mask using our curvature mask and then add a Blur Filter with a small intensity to remove any sharp edges.
Now our cavity's are nice and rough while our peaks have a very different value! Great! But, just like when it comes to the Diffuse the key thing is
BREAKUP BREAKUP BREAKUP
So our next couple layers are going to be all about that. Next, create 2 more fill layers. Set the first one to have a roughness value greater than our Curvature Roughness but less than our Base Layer, I put mine at about 0.6-0.7. The second one should have a roughness value lower than our Curvature Roughness, I usually put this between 0.1-0.2. Mask these out with a fill of either Clouds 3 or BnW Spots 1. Let's do that all now.
Adjust the blending modes and opacity to something you find satisfying. Remember, the goal here is breakup and variation.
That's about as far as we can go with automation and basic fill masks. The rest is handpainting the SHINY areas. Around the eyes, around the lips and nose, in places where sweat builds up like the armpits, under pecs, even the hands to a degree. I put the tear ducts on a new layer and make that EVEN shinier. And then for even MORE breakup, I create a new layer, set it's roughness value to about 0.25 and hand paint some areas with a spots brush, I usually put this on areas where the skin moves, and where it sweats, the forehead, breaking up the eyes and mouth, around the cheeks, under the neck. Just some more breakup and non-uniformity.
Let's do all that now.
That's really hard to see in the Material view, let's switch to the roughness view.
That's WAY clearer for us to see. Continue this process throughout the whole body, keeping in mind where sweat and occlusion would occur and you'll have a perfectly shiny body in no time. Change the blending modes and opacity as you see fit, every body, face and project is different! When you think you've got all your layers, create a new folder and put them all inside and set that folder's blending mode on Base Colour to Screen. That'll remove the digital black we created to see all our roughness details.
Now, onto scattering. Scattering's the EASIEST part here because it relies on a mesh map we already baked out. Thickness! The techniques here aren't hard, they're just a little repetitive. Just make sure you have your scattering maps enabled in Substance. Pull up your texture set settings, go down to channels, hit that little + icon and click on scattering. Just like that we can work on our scattering maps. The whiter the value, the more intense the scattering.
So. Scattering step 1: the Base!
This is the easiest bit yet. Create a fill layer, set the scattering value to something really low, under 0.1. This is the base SSS of the whole body, it's not much but in a renderer like Unreal or Marmoset this little bit goes a long way.
Next, create a new fill layer and mask it off based on your thickness, just like we did with the roughness at the very start. Add a Levels and Invert. Now we're going to create the slightly more intense SSS that happens around the cavity's in our body. We do the same thing as we did in the last step but with Curvature instead of Thickness and adjusting the levels a little more extremely.
Next comes the more specific parts, like the face, the hands, and the feet. The goal here is control and consistency while SSS looks good, too much destroys the detail in our Diffuse and Roughness maps. This is where the Levels we've been using comes in really handy. The whitest part of our whole model should be the ear and nose. Depending on how your Thickness map was baked we might have to separate our detailed SSS into three layers. For the Face, Hands and Feet. Let's start with the face.
Using a Thickness mask and some Levels our goal is make the ears the most intense while generally reducing the SSS of everything else. This isn't hard just finicky.
That's pretty good, now just mask out everything below the neck and we can move on! Usually I leave whatever blending modes the layers are on up to you, but when it comes to Scattering I highly recommend everything except the base layer be set to screen. That way we can build up our scattering detail without destroying what's underneath.
Usually this is where I'd leave it, all the concepts and practices here are easily applicable to all the other areas of the body but I find Scattering to be really finnicky, so I'll cover the hands and feet as well.
When it comes to the hand, the tips of the fingers should have the most intense scattering, but not more intense than the ear, or even the nose. I think the chin is a good reference in value. It's a thin amount of skin over almost direct bone. The rest of the fingers should have a bit of a gradient before completely fading into the palm. The feet is almost the exact same thought process. The method is the exact same as the face, Thickness Map, Levels, Paint out.
And just like that we're done! Overall not that hard, just requires a little know-how, some good reference and a keen eye. That's a full human person, of course there's going to be some LookDev in your renderer of choice but that's about as far as we can push it in Substance.
After setting up in Unreal Engine 4 we can see our final result.
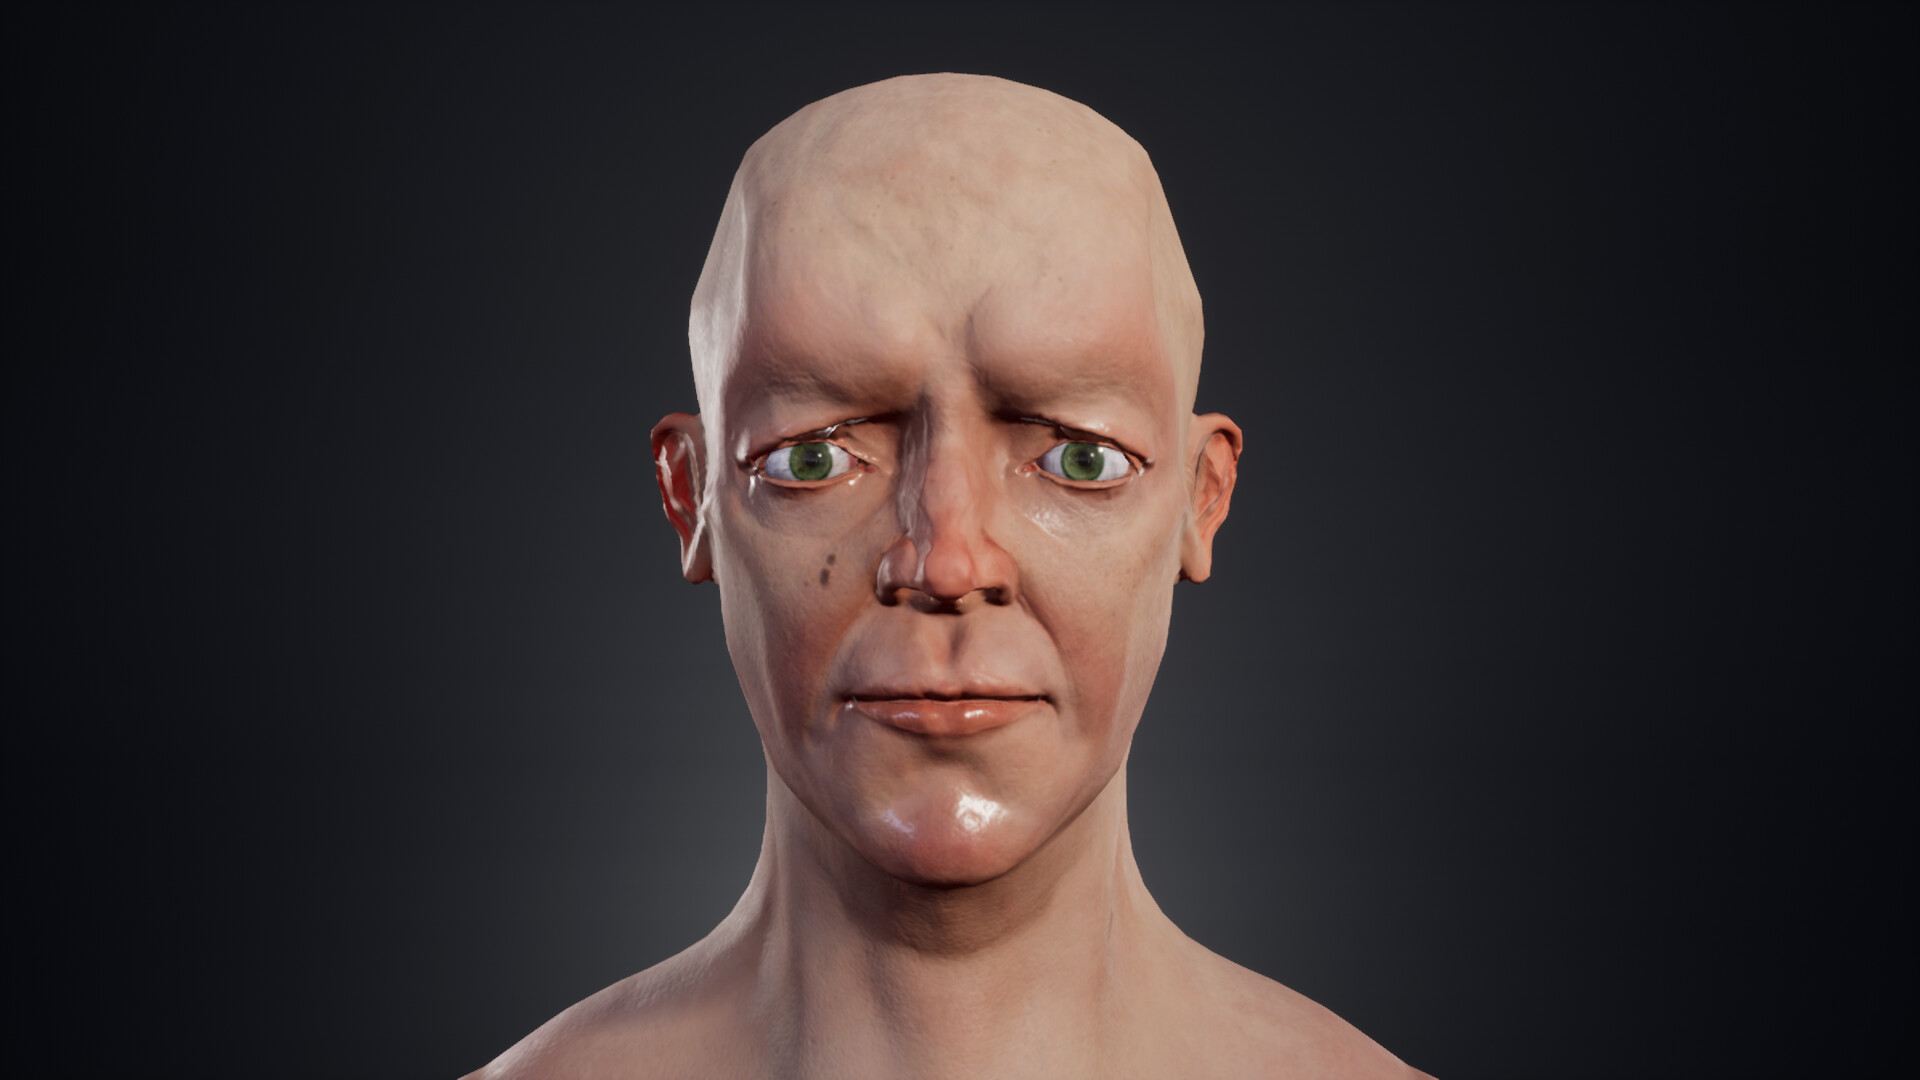
It looks good! Detailed height, very natural colour, believable wetness and roughness and good SSS.
Thanks for reading along! I hope this is all useful to you.